
To get the most out of your RTK receivers, you are going to need to set up your own RTK base. This will give you the best performance and allow you to get the most out of your equipment. However, getting it wrong can cost you hours of rework, and cause you to make costly mistakes. At Bench-Mark, we’ve supported thousands of surveyors across Canada & the US with RTK GPS & GNSS Systems. That is why we know firsthand how a smooth base setup can impact a working day, and what the common mistakes are.
In this guide, we will tell you the essential tips and steps to get your rtk base station up and running and avoid the common pitfalls we see.
What Is an RTK Base Station?
What You’ll Need
Common Mistakes To Avoid
Frequently Asked Questions
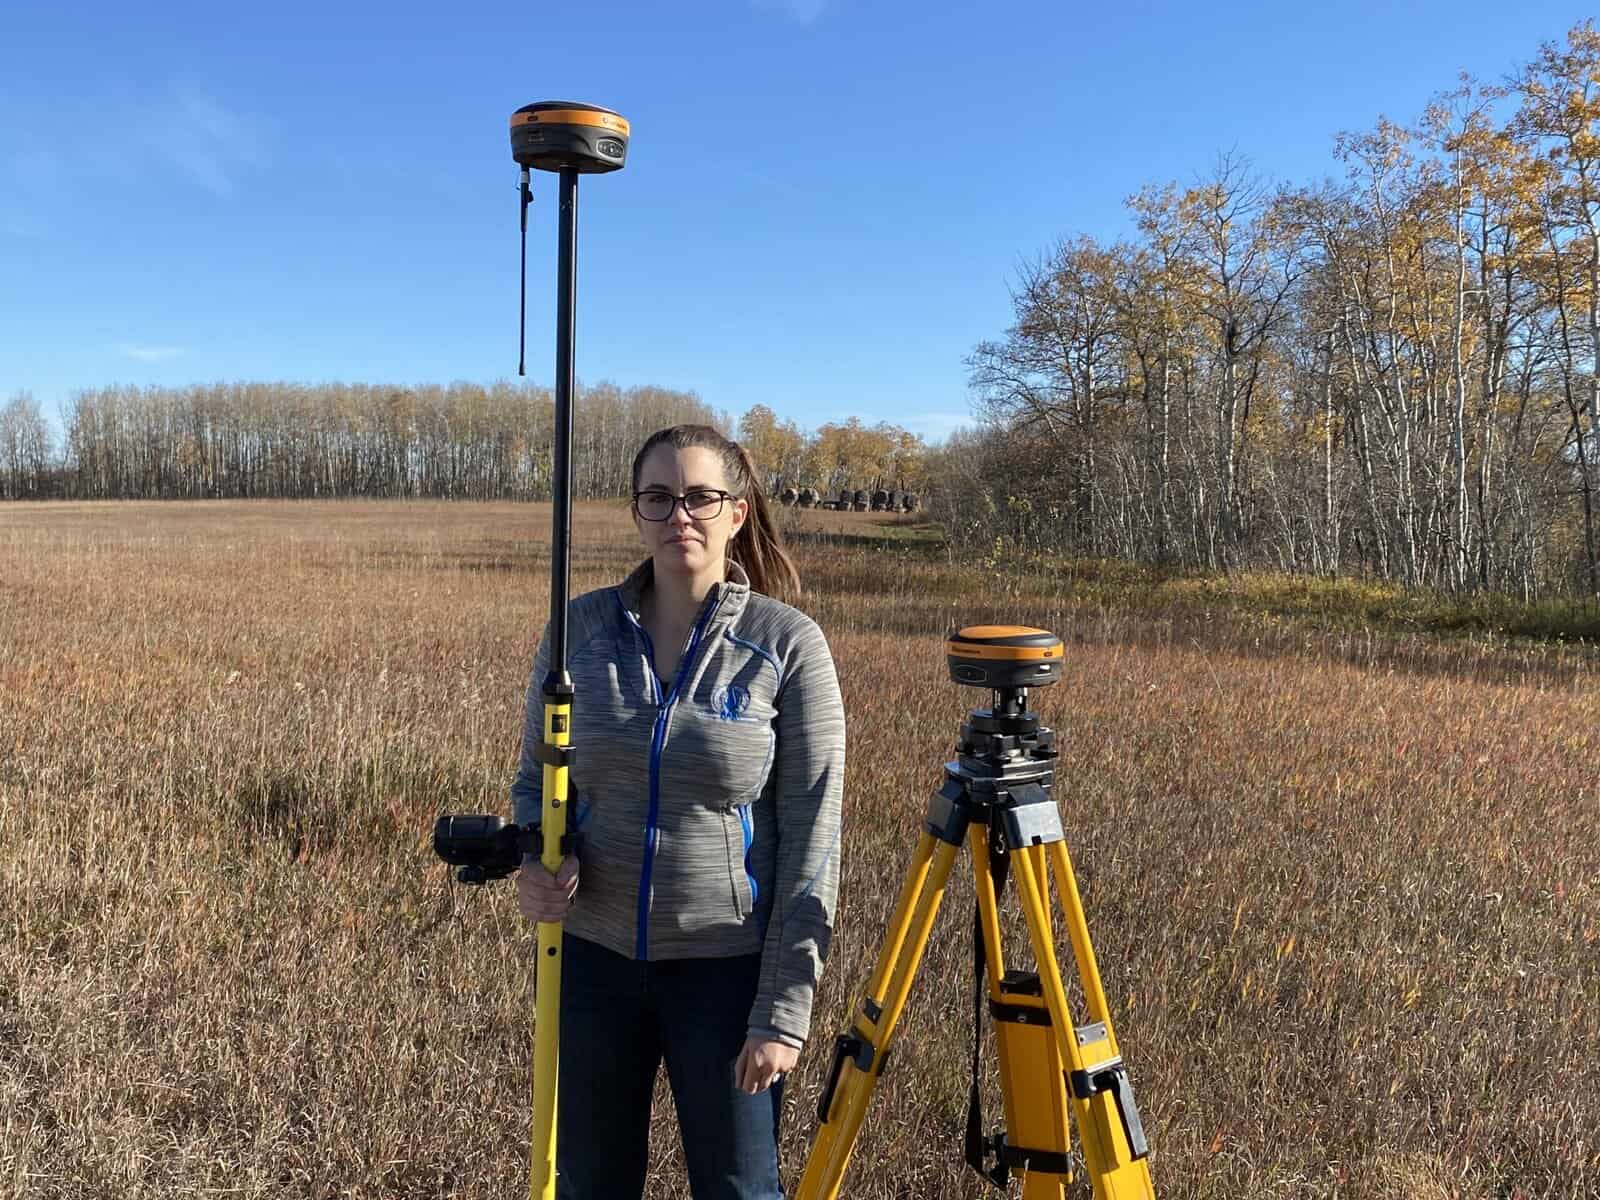
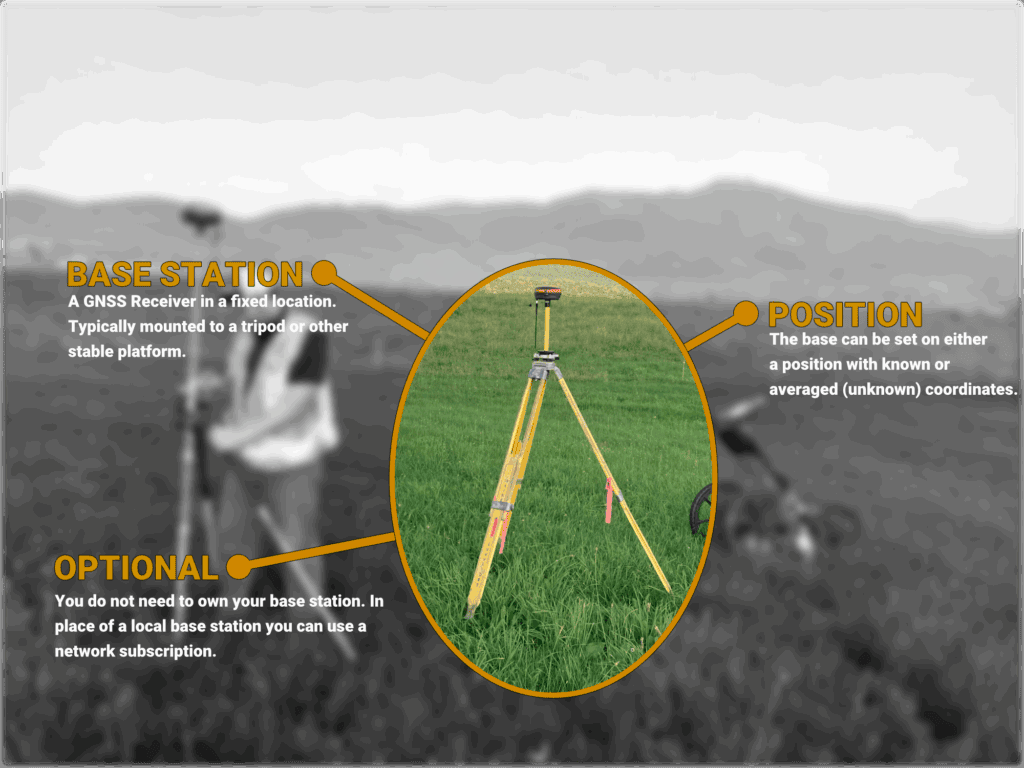
An RTK base station is a fixed GNSS receiver placed on a known or unknown point. It used satellite signals to continuously calculate its position. Then it sends real-time correction data to a rover in the field. Thus, your rover can achieve maximum accuracy, up to centimeters. This practice replaces you being off by several metres using GPS alone.
If you want to learn more about RTK base stations, check out our RTK GPS & GNSS Systems page.
Place your base in an open area with a clear view of the sky. There should be no trees, buildings, or vehicles nearby. Avoid metal surfaces that can cause multipath errors. Use a solid tripod for stability and mark the point with a nail, spike, or monument for future reference.
If you’re doing construction layout or working in rugged terrain, a higher elevation location may help extend the rover’s range.
There are three main ways to set your base position in FieldGenius:
If you have local coordinates, do not use “Known Point” method because FieldGenius expects geodetic values and may give you a “Too far from known point” error. In general, we typically recommend using an average position setup on the first day, and a known point setup anytime you are returning to site.
Using FieldGenius or compatible software:
There are two main ways to broadcast RTK corrections:
Once the base is active and corrections are broadcasting:
If you record everything, it will save you hours when you return to the site. When you have all the data, it’s easier to deal with inconsistencies. Always record:
At the end of the day, there are a lot of things to consider when purchasing an RTK system. Thought must be taken to consider what you can afford and what capabilities you are looking for. Carefully weigh the advantages and disadvantages of a system. Is it a more flexible but initially more expensive option in the base and rover, worth more to you than the time-saving network rover? It depends on your workflow and how you work.
| Base and Rover | Network Rover |
| + Better Multi-Path Performance + Flexibility+ Redundancy + Lower Long-Term Cost + Total Control Over Your Setup – Longer Setup Times – Limited Range | + Easy Setup + Lower Initial Cost + No Physical Base Station – Network Availability – Limited to Areas of Network Coverage – Compatability – Higher Long-Term Cost |
There are many advantages to a base and rover-type solution. A base rover solution offers you total control over your setup, the flexibility to work how you want, lower long-term cost, and control over your baselines, a llowing you to achieve better relative accuracies. In general, a base and rover solution offers the most versatility of any RTK setup.
Arguably, the most important part of a base and rover setup is the ability to have complete control over your setup. This means that you control how your receivers perform, allowing you to achieve consistent and repeatable results (Check out this video on S631 Repeatability Under Canopy). By running compatible receivers, you can optimize your setup, ensuring that you get the best possible solution for your environment. For instance, with 7th-generation RTK receivers, you get access to all of the available constellation signals. With access to more signals, you can perform better in multi-path environments. However, an RTK receiver can only use what a base station can see and broadcast. This means to get the most out of a receiver, you want a base station that can broadcast and use all of the same signals as your rover. Check out this video on comparing a 6th to 7thgeneration receiver to learn how this can make a difference.
6th vs 7th Generation RTK Technology
A base and rover system also allows you to work how and where you want without worry. With the Hemisphere S631, you can use your receivers as both a network rover and a base and rover. In the next section,n we will go over how a network rover can meet your needs, but with a base and rover, you can get the most out of both setups. This type of setup also provides a level of redundancy. If one receiver goes down, whether due to an accident or simply needs an update, you have a second receiver to work with. You also have the option to broadcast corrections over UHF or via a cellular network with a service like StormCaster.
S631 Base and Rover Range Test
An often-underrated aspect of the base and rover kit is that, although a higher initial cost, it does work out to be cheaper in the long run when compared to typical network rover setups. With a Hemisphere S631 base and rover setup, there are no additional subscription costs. This system requires no subscription,s whether that be to a network provider or a cellular carrier.
Finally, with a base and rover set up, you have complete control over the baseline between your base and rover. The accuracy of your rover position depends on the distance from your base station. When you have control over this distance, you can plan your project around maximising your accuracy. You can see this effect in the above-linked StormCaster RTK range video.
One of our customers, Dale, has a typical base and rover setup. For the Hemisphere S631, he has two receivers, a Mesa 3 and FieldGenius software.
As with the base and rover setup, there are multiple dadvantagesto having a network rover setup. A network rover allows you easy setups, flexibility, and a low initial cost. If a capable and reliable network exists in your area, a network rover may be the perfect solution for you.
One of the biggest advantages of a network rover is the ease of setup and the lack of a physical base station. With no base station, you do not have to worry about setting up your own base station and tearing it down at the end of the day. You can turn your rover on, connect to the network, and begin surveying. On top of this, you do not have to worry about a base station being stolen or damaged while you are surveying elsewhere.
FieldGenius Network Rover Setup
FieldGenius for Android Network Rover Setup
Compared to a base and rover setup, a network rover requires much less equipment. Typical setups consist of a single receiver, a pole, and data collector.
If you are someone who is visiting multiple sites a day, the network rover may be the best solution for you. As long as you have network coverage, of which most North American cities have at least one network option, you can survey. This means that you can arrive on site and start surveying with 2-3 minutes instead of the 10-15 minutes you would take to set up a base and a rover.
The final, and often most important reason to choose a network rover system is the lower initial cost. By choosing not take the 2nd receiver, you can avoid a high initial cost. As a result, you can invest money in other tools, including a robotic total station or CAD drafting software.
A base and rover solution offers many advantages; however, there are a couple of disadvantages in a base and rover system that you should know about before purchasing. A base and rover system does have longer setup times and is limited by range. Understanding how these factors affect how you can work is important in getting the most out of your system.
One of the biggest disadvantages of a base and rover system, especially when compared to a network rover, is the setup time. Setting your base up and tearing it down takes time, anywhere from 1 to -30 minutes a day. This adds up over the course of a week, especially when a network rover setup can take as little as 2-3 minutes. You also have to find a suitable location for the base where it will not be knocked down or stolen. This requires a lot more pre-planning than your average network rover project.
The other drawback to a base and rover setup is the limited range. With a base and rover setup, although you have total control over the setup, you are still limited in the range you can go from the base. Often, the limiting feature is the UHF radio range. Whether it is terrai, or you simply have to go further than the radios are capable, you may have to move your base multiple times on the same job to ensure you can collect all the points you need. You can extend the range with an external radio or a service like StormCaster, but you are still limited by baseline distances.
There are several drawbacks to network rover solutions, all of which need to be considered before purchasing. These include the availability of your local network, the generation of the network, what message types are available, and the ongoing subscription costs. Although the network rover is appealing at first glance due to the lower cost, there are a lot of potential draw backs.
Depending on where you are located, the coverage available for NTRIP networks may not be able to meet your needs. There are two factors to consider: the availability of a consistent cellular connection, as well as the NTRIP network coverage. If you do not have a network connection, you will be unable to access the network, meaning you will be unable to complete your work. In cities and towns, this may not be an issue; however, in rural locations, you may not have the coverage you need to complete a project. Before subscribing to a network, understand where the coverage is and where the edges of that coverage exist. The further you are from a base station, the less accurate and repeatable your results will become.
The next factor to consider when purchasing a network rover is to check the message types and age of the base stations in the network. As we stated earlier, a rover is only able to use the messages broadcast by the base to generate a fixed solution. This means that if the network consists of older base stations, that only support an older message, such as RTCM 3.0, you are effectively handicapping your modern receiver. For instance, if you have a 7th-generation RTK receiver like the Hemisphere S631, on an older RTCM 3.0 network, the S631 can only use GPS GLONASS L1 and L2 to generate a fixed solution. As a result, under the canopy and near buildings, you will not see the performance you are expecting. Even the difference between a 7th and 6th generation receiver is night and day.
Hemisphere S631 v S321 Canopy Test
The final downside of a network rover, which often goes ignored at the time of purchase, is the ongoing subscription costs. Unlike with a base and rover setup, the network rover has ongoing costs. To subscribe to a VRS network can cost upwards of $3500 a year, and you have to factor in the cost of your cellular plan as well. Within 2-3 years, this can amount to the cost of a base station.
Try to remember these common mistakes to prevent them and follow the steps above for accurate, consistent data day in and day out. If you still have questions or need help with your Hemisphere S631 or GeoMeasure gear, reach out to us! We are here to support surveyors with the tools and advice they need to get the job done right.
Even with the right equipment and a solid setup routine, a few recurring mistakes trip up new RTK users more than any others.
This is the most common issue we see with new FieldGenius users. It happens when you try to use the Known Point setup but only have local Northing and Easting coordinates. FieldGenius expects geodetic values, and without them, the software may default to 0° lat / 0° long, placing your base off the coast of Africa. The fix is straightforward: if you only have local grid coordinates, use Local Transformation to Point instead of Known Point.
You survey all day, collect great data, come back the next day, and everything has shifted by a foot or more. This happens when you re-average your base position on day two instead of returning to your saved point. Because the rover relies entirely on the base for corrections, even a small difference in the base position offsets every point you collect. Always save your base coordinates on day one and use Kthe nown Point setup on the same marked location when you return.
Unlike the previous mistake, this one doesn’t produce a consistent shift. It produces random, unpredictable differences between days. It occurs when a new Local Transformation is performed on day two using a slightly different GPS position tied to the same local coordinates. The software ends up with two conflicting sets of coordinates mapped to the same point. If you used a Local Transformation on day one, save both the GPS and local coordinates, and on day two, use the Known Point setup with the saved data rather than starting a new transformation. If things do go wrong, reset your localization entirely and redo it carefully from scratch.
Yes. Just mark your point and use “Known Point” mode with the saved coordinates.
Use “Average Position” the first time, then store and reuse those coordinates later.
Up to 10-15 km with UHF radio, or virtually unlimited with NTRIP over LTE.
Make sure you’re using the same base setup and not re-averaging. Even a small change can shift your entire dataset.
The base station stays fixed and sends correction data. The rover moves around the job site and uses those corrections to calculate its exact position. Without the base, the rover’s GPS data would be off by several meters, but with RTK, you’re down to centimetres.
This usually happens when you’re using the “Known Point” setup option but only have local coordinates (like Northing and Easting), not geodetic coordinates (latitude and longitude). Use “Local Transformation to Point” instead.
No. Averaging the base position on different days will shift your data, causing inconsistencies between datasets. Save the coordinates from day one and use “Known Point” setup on the same location each time.
You’ll get inconsistent data. The software may apply overlapping transformations, causing points to shift unpredictably across days. Always reset or reuse saved transformations when returning to a site.
Always mark your base point, save its geodetic or local coordinates, and reuse them. Use a solid tripod, avoid obstructions, and double-check your setup mode and coordinate system.
Known Point: When you have exact geodetic coordinates and are returning to a saved location.
Average Position: Only for first-time setups on unknown points.
Local Transformation: When you only have local grid coordinates (e.g., Northing/Easting) and no latitude/longitude.
