Using a dumpy level is much like using any other RTK GPS surveying equipment. Although there is often less technical information provided with this device. We go through the entire process of setting up and using your survey equipment below.
A dumpy level is an optical surveying instrument used to measure and transfer horizontal levels across a site. It consists of a telescope mounted on a tripod, kept perfectly horizontal by a spirit bubble. Unlike more complex digital instruments, a dumpy level relies on a straightforward line-of-sight method, making it a reliable and cost-effective choice for construction, grading, and land surveying tasks. Its simplicity is one of its greatest strengths. With proper setup, it consistently delivers accurate elevation readings across a wide range of field conditions.
The first step in using your dumpy level, or any other surveying equipment, is finding a benchmark. These are locations left by previous surveyors that mark a specific height, making it easy to affirm your measurements. If there are no nearby benchmarks, consider using an easily identifiable landmark instead.
Look for markers that are stable, well-documented, and easy to access. Confirm the benchmark’s elevation from a trusted source before starting, and double-check that the point is unobstructed so your readings remain consistent throughout the session.
Now it is time to select a location to set up your surveying equipment. This area should be wide open and free of obstructions. It must also be level, which is why most tripods come with a bubble level.
Next, it is time for you to mount your surveying equipment. Use the levelling screws to ensure it is at the proper height and orientation. Once you’re sure that it is level, rotate it in the opposite direction and ensure it maintains its orientation. Secure all tripod clamps firmly so the instrument remains stable during the measurement process.
After levelling, make small adjustments to eliminate any residual tilt. Re-check the alignment after rotating the device to confirm that no movement occurred during setup.
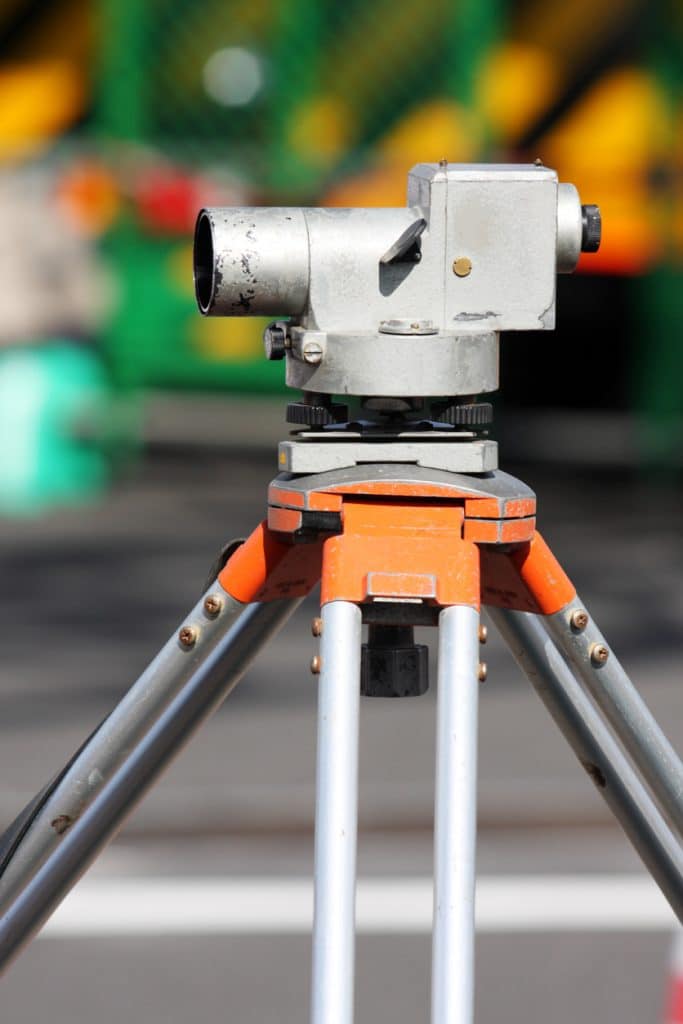
Start by removing the lens cap that comes with your surveying equipment, and then adjust the focus knobs until the picture is clear. Begin by adjusting the eyepiece to sharpen the crosshairs before focusing on the staff. Make incremental adjustments instead of large turns, ensuring the image remains stable and sharp. If heatwaves or lighting conditions affect clarity, wait a moment and refocus to maintain accuracy.
You are now ready to begin taking measurements. Use your signal position and rover to measure the different areas of your survey location. Record readings methodically, starting from your benchmark and moving outward in a consistent pattern. Take multiple readings for each point to confirm accuracy, especially if you’re learning how to use a dumpy level in varying field conditions. Keep notes organized so you can easily calculate differences in elevation later.
Getting your dumpy level properly set up before you begin is essential for reliable results. Follow these steps to ensure a stable and accurate configuration:
Before starting a levelling survey, make sure you have all the necessary equipment ready. A complete setup typically includes:
The tripod provides a stable platform for the instrument, while the levelling staff is used to obtain elevation readings. Having a reliable benchmark and an organized recording system is equally important, as accurate levelling depends on consistent measurements and proper documentation throughout the survey process.
The first step in using your dumpy level, or any other surveying equipment, is finding a benchmark. A benchmark is a point with a known elevation that serves as the reference for all measurements taken during the survey.
If no official benchmark is available, select a stable and easily identifiable feature that can act as a temporary reference point. Ensure the point will not move during the survey and record its elevation clearly in your field notes.
Position the tripod on firm, stable ground with a clear view of the survey area.
Spread the tripod legs evenly and adjust them so the mounting plate is approximately level. Push the legs firmly into the ground if working on soft terrain to prevent movement during measurements.
Secure the dumpy level to the tripod using the mounting screw.
Use the levelling screws to centre the spirit bubble. Rotate the instrument and verify that the bubble remains centred in all positions. Continue making fine adjustments until the instrument remains level throughout a full rotation.
Remove the lens cap and adjust the eyepiece until the crosshairs appear sharp and clearly defined.
Once the crosshairs are focused, sight the levelling staff and use the focus knob to sharpen the image. Proper focusing helps eliminate parallax errors and improves reading accuracy.
Position the levelling staff on the benchmark and sight it through the telescope.
Record the reading where the centre crosshair intersects the staff. This is your backsight reading and will be used to calculate the height of instrument.
Add the backsight reading to the known elevation of the benchmark.
For example:
Height of Instrument (HI):
100.000 + 1.625 = 101.625 m
This becomes the reference elevation for all subsequent measurements.
Move the staff to each point requiring measurement.
Keep the staff as vertical as possible and sight the centre crosshair onto the staff. Record each reading carefully in your field notebook.
For best results, gently rock the staff forwards and backwards. The lowest reading observed represents the true vertical position and should be recorded.
Maintain clear and organized notes throughout the survey.
For each point, record:
Accurate record keeping helps prevent errors and simplifies calculations later.
When moving the instrument to a new setup position, take a reading on a designated change point.
This reading becomes the foresight and is used to transfer elevations accurately between instrument setups.
Before finishing, review all measurements and calculations.
Where possible, close the level loop back to the original benchmark to verify that no significant errors have occurred during the survey.
Reading a levelling staff accurately is one of the most important skills when using a dumpy level.
Most levelling staffs are marked in metres, decimetres, centimetres, and millimetres. The large numbers typically indicate decimetres, while the smaller graduations represent finer measurements.
Look through the telescope and identify where the centre horizontal crosshair intersects the staff. The reading at this intersection is the value that should be recorded.
A tilted staff introduces measurement errors. The staff operator should gently rock the staff forwards and backwards while the observer watches through the telescope. The lowest reading observed represents the correct vertical position and should be used.
Three fundamental terms are used in levelling surveys:
A backsight is the first staff reading taken on a point of known elevation, usually a benchmark.
Its purpose is to establish the height of instrument.
The height of instrument is the elevation of the telescope’s line of sight.
Formula:
HI = Benchmark Elevation + Backsight Reading
Example:
HI = 101.625 m
A foresight is a reading taken on a point whose elevation is to be determined.
Formula:
Point Elevation = HI − Foresight Reading
Example:
Elevation = 99.372 m
These three values form the basis of all dumpy level calculations.
To determine the elevation difference between two points:
Height Difference = Backsight − Foresight
Example:
Height Difference = -0.628 m
The foresight point is 0.628 m lower than the benchmark.
Reduced Levels (RLs) represent the elevation of measured points relative to a datum.
Formula:
RL = HI − Staff Reading
Example:
RL = 99.652 m
Formula:
HI = RL + BS
Example:
HI = 101.625 m
Using a levelling book to record backsights, foresights, and intermediate sights helps ensure calculations remain organized and easy to verify throughout the project.
| Feature | Dumpy Level | Automatic Level | Digital Level |
| Levelling Method | Manual | Automatic compensator | Electronic |
| Reading Method | Visual | Visual | Digital staff reading |
| Accuracy | High | High | Very high |
| Ease of Use | Moderate | Easy | Easiest |
| Data Recording | Manual | Manual | Electronic |
| Cost | Lowest | Moderate | Highest |
| Best For | General surveying and construction | Construction and site levelling | High-precision engineering projects |
A dumpy level remains a popular option because of its durability, simplicity, and affordability. Automatic levels offer faster setup, while digital levels reduce human reading errors and improve productivity.
Once your instrument is set up and levelled, you are ready to carry out your survey. Position a leveling staff at your chosen benchmark and take an initial backsight reading through the telescope. This reading establishes your height of instrument, the reference point from which all other measurements are calculated.
From there, move the staff to each point you need to measure and take a foresight reading. The difference between your backsight and foresight readings gives you the change in elevation between those two points. Work systematically across your site, recording every reading clearly as you go. If the survey covers a large area, you may need to set up the dumpy level in multiple positions, using intermediate points (known as change points) to carry your levels forward accurately.
Getting the most out of your dumpy level comes down to consistency and attention to detail in the field. Keep these practical tips in mind:
Double-check your readings by closing your level loop back to the starting benchmark, any significant difference indicates an error that needs to be investigated.
If you are interested in learning more about your surveying equipment, including the best processes for taking measurements or general maintenance tips, contact Bench Mark US today. We have the support and staff you need to carry out any surveying operation.
A properly calibrated dumpy level can provide highly accurate elevation measurements suitable for construction, site grading, and surveying applications. Actual accuracy depends on setup quality, staff positioning, and operator technique.
Levels are calculated by first determining the height of instrument using a backsight reading and then subtracting subsequent staff readings to calculate elevations.
A dumpy level requires manual levelling, while an automatic level uses an internal compensator that automatically maintains a horizontal line of sight after initial setup.
Read the value where the centre crosshair intersects the staff while ensuring the staff remains perfectly vertical. For maximum accuracy, use the lowest reading observed during the staff rocking process.
A dumpy level is primarily designed for measuring elevation differences. While some surveyors may estimate distances using stadia lines, the instrument is not intended to replace dedicated distance-measuring equipment.
A backsight is a reading taken on a point of known elevation to establish the height of instrument. A foresight is a reading taken on a point whose elevation is being calculated.
Bench Mark Equipment & Supplies is your team to trust with all your surveying equipment. We have been providing high-quality surveying equipment to land surveyors, engineers, construction, airborne and resource professionals since 2002. This helps establish ourselves as the go-to team in Calgary, Canada, and the USA. Plus, we provide a wide selection of equipment, including global navigation satellite systems, RTK GPS equipment, GNSS receivers, and more. We strive to provide the highest level of customer care and service for everyone. To speak to one of our team today, call us at +1 (888) 286-3204 or email us at [email protected]